To make the scarf joint, I clamp four plywood pieces on top of each other on a table, with the edges stepped 3 inches apart. I use a hand plane and belt sander to make the 3 inch steps into a smooth ramp (with a 12:1 slope). Here is what it looks like finished. Not bad for my first plywood scarf.


I then test fit the pieces onto the boat and mark a straight line across the scarf joint, so that I can line them up about right when I glue them. I cut the pieces slightly wider than necessary, in case I don't scarf the pieces perfectly straight. Then I trim them more accurately with a hand plane after they are scarfed together.
Here is a pic of one plank already on the boat and another set being glued together. I just wrap the glue joint in plastic and put textbooks and an old axle on top to press it all together. I like textbooks, because I have them laying around and they are flexible, so they create even pressure on the glue joint. Sandbags or something would also probably work.

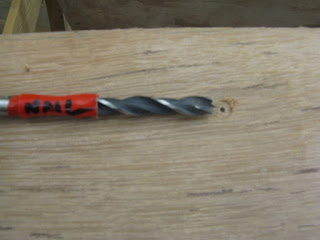
After the scarf joint is glued and the plank is trimmed to fit, it's glued and nailed to the frame. The nails went into the wood frame without splitting it, but I had quite a hard time sinking the nail heads below the surface of the hard plywood when installing the first plank. (Imagine me quickly hammering on a nail punch trying to finish before the glue cures, cursing while I keep smashing my hand with the hammer). So I modified a cheap wood drill bit to make a counterbore. The bit makes a nice flat counterbore with a shallow dimple to help start the nail (but not an entire pilot hole). This makes nailing the planks much easier. I make the counterbores very shallow, since this is very thin 1/4 inch plywood.

So I clamp the plywood to the boat (again), countersink all the nail locations, remove the plywood, apply the glue, and quickly nail it all back together before the glue cures. I punch the nail heads slightly beneath the surface of the plywood and cover them with thickened epoxy.
And here is a picture outside my garage workspace ... cold and snowy, but I'm still building in comfort.

Hmmm let's see, do I have any good animal pics ... here's a good one.

Hello,
ReplyDeleteI am enjoying your blog about the build. I was wondering if you can tell me how you make the countersink bit for the bronze screws.
Dave
Hello Ryan,
ReplyDeleteI recently found your site and I'm enjoying following your progress. I was wondering if you can give some details on how you made the counterbore bit for the bronze nail heads.
Dave