Sunday, June 12, 2011

Coamings and Oarlocks

Sorry about the inconsistent blogging ... yes, I'm still making progress on the boat.  No, I haven't fallen off the (boat building) wagon.  I'm dedicated to finishing this little boat this summer.  Although, I've gotten a little distracted with gardening and also homebrewing beer, (because I figured I needed some homebrew to splash on the bow of my homebuilt boat on launch day!)

Here's my latest progress.  The hollow coamings are painted inside first before putting on the last piece of plywood.  Two coats of primer and two coats of topcoat.

Painting inside the coamings.
The plywood for the small backrest is cutout and prepared for gluing.  Small cutouts are made in it for access to the hollow of the coaming.  A good place to store peanuts or something maybe.

Preparing the coaming plywood for gluing.
 After that piece of plywood is glued and nailed on, the top of it is trimmed flush with the belt sander, then a 1/2" thick oak capping is glued and nailed.  If you look close, you can see some scarf joints, since the capping is made of multiple pieces of oak.  I only had a few short pieces of oak left and I decided to use this instead of buying a new long piece. 
The coaming plywood glued and nailed.  Also the oak capping pieces and oarlocks installed.
 The recess for the oarlock sockets are carefully drilled and chiseled out of the top of the coamings.  (I'm pretty handy with a chisel since I had some practice with it when installing some hardware on some interior doors of the house a few years back).

Here is a closer pic of the oarlock socket installed in the coaming.
The oarlock sockets mortised into the top of the coamings.
The oarlocks are positioned toward the outboard edge of the coamings so that the oars move freely without rubbing.  The oarlocks are positioned longitudinally (fore and aft) for a person sitting backwards on the centercase trunk to comfortably operate them.  I sat in the boat for quite some time pretending to row until I found a comfortable position for the oarlocks.  A person could also row facing forward sitting on the aft deck or standing up.

Here is a pic of the oars in the stowed position.  For convenience, I'm going to try to leave the oars in the oarlocks and just flip them back into this position while sailing.  Hopefully that will work, because I have no where else to stow these 8ft oars on this little boat!  In this position, they hang about 1ft off the stern.  I'll have to make some tie down straps or something to secure them.


The oars in their stowed positions.

 In other news, the sheriff came by the house to inspect the boat last weekend and I just received my title and registration in the mail.  So now there is nothing keeping me from launching the boat in local waters ... except that construction isn't quite done yet.  I was toying with the idea of taking her out for a row soon, but decided that the first launch will also be her first sail too.  I'm hoping to launch her in August, but we'll see.
The hull construction is now complete, besides some cosmetic sanding, filling and painting work.  There's still a lot of work to be done, but this is quite a milestone.


Sunday, May 8, 2011

Spar Making - Part 2

 I already cut out all the pieces necessary to glue up the mast.  Next comes nailing and gluing all the pieces together.  I pre-drilled all the nail holes to prevent wood splitting.  To make sure that there was enough time to glue and nail the mast together before the glue cured, I tapped all the nails in to start them.  Then I mixed the glue and nailed it all together.  Not a very complicated process, but it was a lot of work and did take me the majority of a Saturday.

That's a lot of bronze nails that will hold the mast together.
 Here is the mast after gluing, but before shaping and sanding.  The slot running down the length of the mast is for the bolt rope of the sail to slide along.

The aft side of the mast with the bolt rope groove, (before shaping and sanding).
The base of the mast, before shaping and sanding.

And here is the mast shaped and sanded.  Most of the work was done with a belt sander and hand sanding.  The mast is 18 feet long.  This is a good photo to give you an idea of how long it is.  The boom, (shown in the last blog post) is 9 feet long and also pretty much finished.  Both of them turned out pretty straight.  Since they are held together with nails, I didn't need to clamp them to a workbench with dozens of clamps like I have seen pictures of some people doing.  And the nails will prevent the glue seams from splitting like some people have complained about with this mast design.

Me and my mast.

Oar Making - Part 3, Finishing

   The 8 foot oars are now finished.  A 6" section of the oar is reinforced with 1/8" diameter rope which is wrapped around then epoxied in place. The size of the rope is selected so that the finished diameter fits nicely in the oarlock.  And the position of the reinforced area is carefully selected to match the beam of the boat. 
   Then the oar gets one coat of epoxy and 2 coats of spar varnish (including the epoxied rope), except for the handle, which only gets some lindseed oil.  (The varnish would hurt hands when rowing).  Some bungie cord is braided above the oarlock to make a "button".
   Also shown in the first photo is the 9 foot boom, which is also pretty much done.


Sunday, March 27, 2011

Oar Making - Part 2, Shaping

Let’s see if I can shape an oar with my primitive wood working tools.  Reading the online directions for making oars is a little intimidating, since they specify using woodworking tools that I don’t own or have a desire to own.

After the oars are laminated, all of the subsequent steps involve one concept: removing everything that isn’t an oar.  First, I trim off excess material with a wood saw, then clean it up with a belt sander.  When first shaping the oar, I'm keeping all the cross-sections square for now.  I'll round it later.

Roughly trimming off excess from the blade.

The rough trimming is cleaned up with a belt sander

The handle is then cutout.  The excess material is hacked off with a saw.  The nice rounded transition area is done with the front roller of the belt sander.

The shape of the handle is drawn.
Excess material around the handle is carefully removed.
The handle with a square cross-section.

More material is removed from the handle to make it round.  You may notice that the handle is slightly tapered toward the loom (or shaft).  This is done on purpose and makes the handle more comfortable.


Next, a homemade spar gauge is used to mark out an octagonal shape. The cross-sections of the loom are made approximately octagonal using a plane.


Spar gauge.


The octagonal cross-sections are then sanded round with a belt sander and hand sanding.  Excess material is also taken out of the blade using the belt sander.

Blade of oar part way though shaping.
  Here's a good before and after shot after the first oar is shaped.
Oar after lamination (left) compared to finished oar (right)

Finished handle.
 
Finished oar
 The oars are balanced the same and weigh approximately the same so they will feel the same while rowing.  They won't win any beauty contests, but they will work!


Next up, I'm going to finish the coamings.  I'm laminating multiple layers of 3/4" lumber to form a boxed coaming ... but more about that next time.  Here are some pics of the first layer being glued on.

First layer of lamination for coaming.


Sunday, March 13, 2011

Glued mast step and rub rail

I glued the mast step to the top of the cabin.  There are also screws securing it from underneath.  It looks very strong.

The mast step glued to the cabin roof.  Still needs some sanding.

 I also installed the rub rail and a trim piece along the edge of the cabin roof.  They are both made of white oak.  Not much explanation necessary here.  I just cut out the pieces roughly, glued and screwed them to the boat, then sanded smooth with a belt sander.

Rub rail and cabin side trim just after gluing.
Rub rail just after gluing.
Cabin side trim just after gluing.
Cabin side trim sanded flush.

Oar Making - Part 1, Lamination

I'm making some oars for axillary propulsion. Hopefully these will be adequate and I won't need an outboard motor.  I'm going to install some oarlocks on the tops of the coamings ... details on that in a later blog post.

I've spent a lot of time pondering a number of issues regarding the oars:
 - if oars for this boat even possible, since its so wide (6'6" beam) and has coamings,
 - the length of the oars necessary,
 -where the rower would sit ... there are no thwarts to sit on like on a row boat,
 - whether to buy or make the oars
 - and, most vexing, where to store the oars out of the way while sailing.

I've never made oars before, don't have the right tools probably and have no idea what I'm doing, but I decided to make some 8 foot long oars out of some rather cheap pine 1x8 boards from the local home improvement store.  Total cost is about $40 for two oars and a weekend of work.  8 ft oars will not store anywhere on the boat.  So while sailing, I'm just going to leave them in the oarlocks, rotate them so they are lengthwise with the boat and lash them down to the top of the coamings.  They shouldn't be in the way.  I was considering some 7 ft oars that could fit in the cabin, but that's too short and retrieving them from the cabin would be annoying.

There are some equations for calculating the length of the oar based on the beam of the boat, but they suggested that I make 9.5 foot oars, which are too long to lash to the coamings while sailing.  8 ft is the longest practical length for this sailboat I think.  (I can also just barely fit 8 ft oars in my car, so that'll be convenient).

After doing some research online, I learned that store bought oars are not balanced correctly and too expensive.  I found some oar plans online by a guy called Culler.  His plans show oars with long narrow blades and are balanced for easy rowing.  Here are some links to the free plans I'm using:
www.riverswest.org/Pete_Culler_Oars.pdf
www.cmdboats.com/pdfs/Good_Oars_E-Book.pdf

The oars are laminated with 3 layers of 3/4" pieces of pine (one of the recommended varieties, others include spruce and doug fir).  I just cut the pattern from a 1x8.

An oar in pieces before lamination.
 Then I roughed up the surfaces to be glued with 50 grit sand paper, wet the surfaces with unthickened epoxy, then glued (with thickened epoxy) the 3 layers together.  I clamped the oar to the edge of the workbench, makings sure that the oar is straight while the glue cures.  The cheap wood I'm using was a little warped, but the oar should come out straight. I'm of course being careful to not glue the oar to the table.
An oar being laminated together.
 Next, I'm going to taper and shape the oars, removing any material that isn't an oar.  Shouldn't take too long.  That will be shown in "Oar Making - Part 2".

Monday, February 14, 2011

Spar Making - Part 1

I've started making the mast and boom. They are going to be made of Douglas Fir wood. I debated between wood and the (infinitely more popular) purchased hollow aluminum extrusion. I decided on a wooden mast because it's slightly cheaper, has more character, and, most importantly, fits with the whole spirit of this do-it-yourself project.

The mast is going to be hollow box-section and the boom is going to be a solid rectangular section. Here is the cross-section of the mast from the plans.

The boom is about 9 feet long and the mast is about 18 feet long (just a few inches shorter than the garage). The lumber I purchased is only 12 feet long, so I need to scarf together pieces for the mast.

The pic below shows all the douglas fir pieces of the mast and boom cutout and ready to be glued together. The pieces on the right are for the boom. The longer pieces on the left are for the mast. An important detail to notice is that all of the scarf joints are staggered, so that they will not be all in one spot of the mast. This makes the mast stronger. (Also shown in the middle of the pic are some oak pieces that will be the rub rail along the shear line of the boat ... not related to the spars.)

This took me an entire Sunday, because all of the pieces had to be ripped (cut lengthwise) and then planed (shaved down to the correct thickness). Then the diagonal scarf joints had to be cut for all the mast pieces. A table saw and a bench planer are pretty much mandatory tools for these tasks.

I've also started making the mast step. The mast step is where the base of the mast rests on the boat. There can be large forces traveling through this joint, so it need to be built stout.


The mast step in the plans doesn't seem quite strong enough to me, so I've decided to beef it up a little. Here is a pic showing the side of my mast step (left) compared to the one shown in the plans (right). I'm also going to secure everything with big screws and lots of epoxy.

On this boat, the mast step performs another function, which is to support the mast while the boat is being trailered. So the spacer block of the mast step should be angled on top to match the angle of the mast in the trailered position, as shown in the pic below.


Here is a pic of the mast step during the initial dry fit, just before gluing.

Tuesday, February 1, 2011

Companionway Frame

The excess plywood of the cabin deck is trimmed with a hand saw and then sanded flush with a belt sander.


The frame around the companionway opening is screwed and glued in place. The plywood is sandwiched between two pieces of frame, making a slot for the companionway drop board (or removable door) to secure in. The two holes on the lower horizontal frame piece are for drainage.


The companionway drop board (a piece of plywood cut to shape) is being trimmed to fit the opening. Since the sides of the opening are at an angle, the door only has to be lifted about 4 inches to remove from the opening. I plan to make a top hatch that fits over and around the drop board, so that it should be fairly water tight. I will probably put a little circular window in the drop board too.


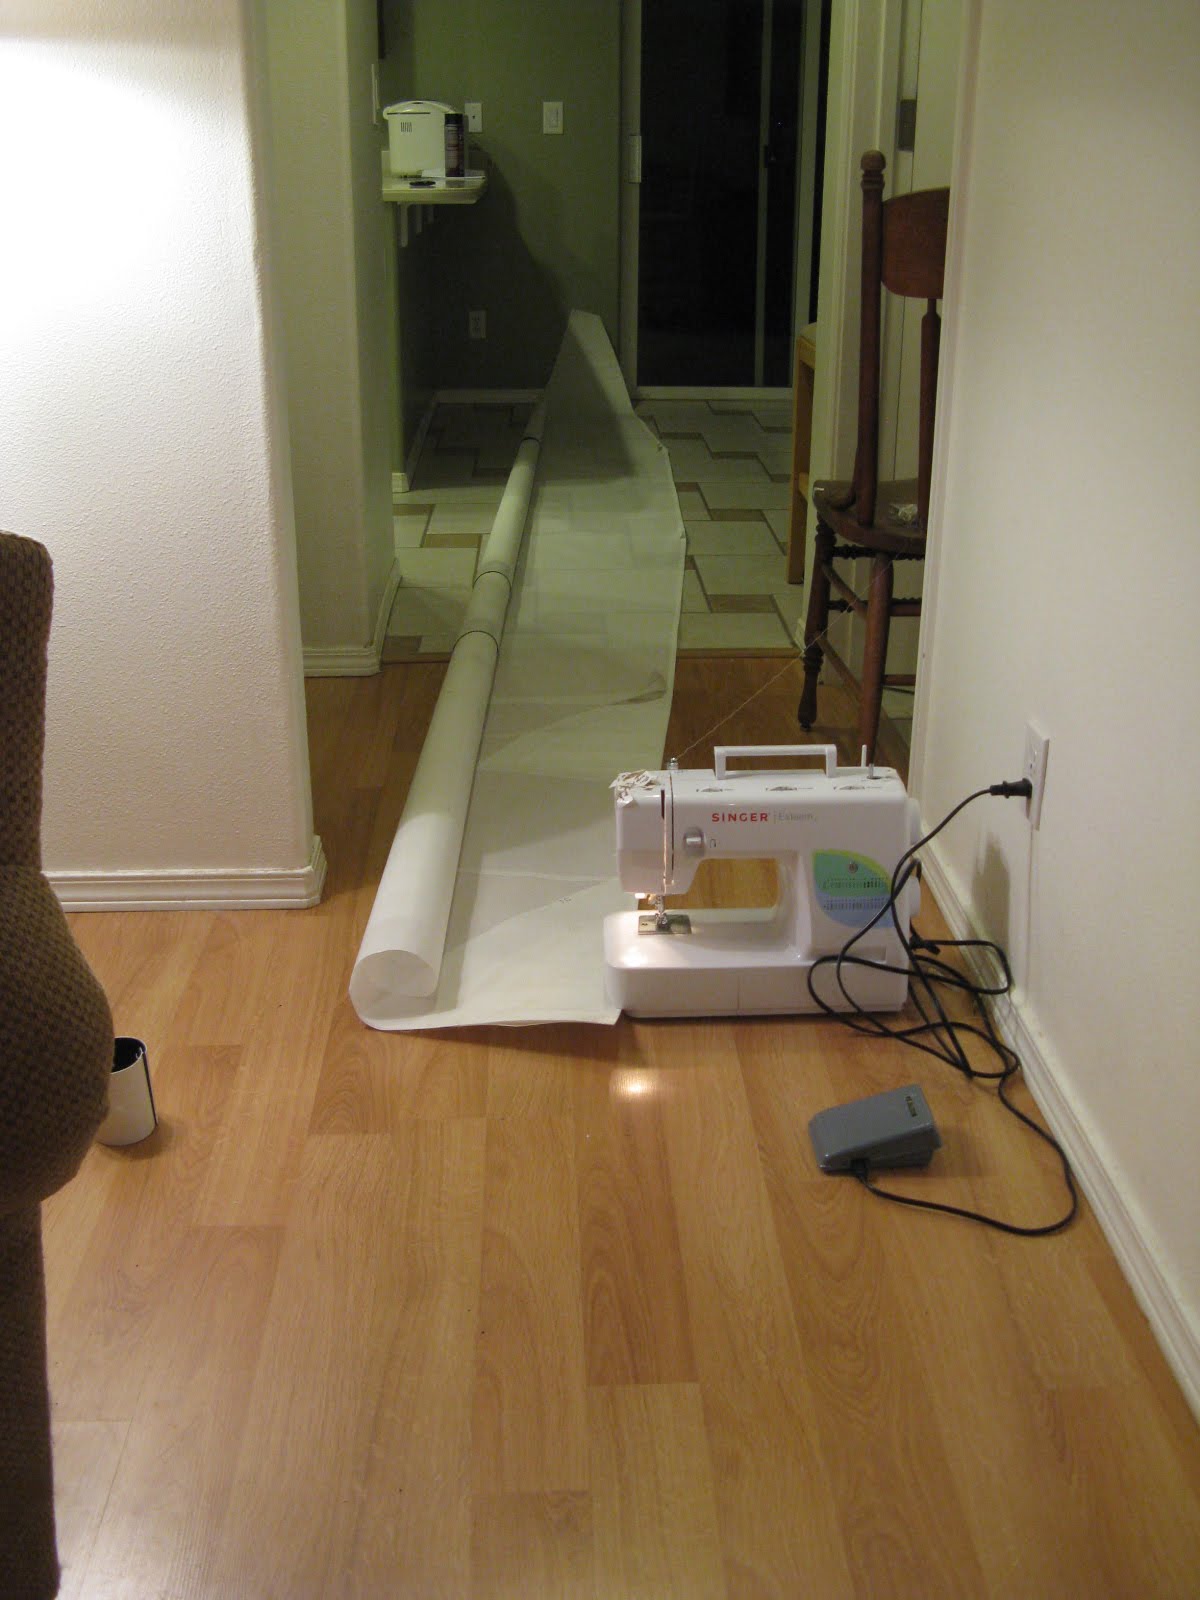
I've also been sewing the large main sail together.

However, we had to move outside of the small spare room into the longest hallway of the house. I needed enough room to fit the rolled up sail on either side of the sewing machine when doing long seams.

Here is a homemade sail-making tool that I can't live without: a short length of plastic drain pipe cut down the middle. This makes a great clamp to keep the sail rolled up.


I'm almost done with the mainsail and I haven't gone into too much detail about it on this blog. Part of the problem is that the sail is always rolled up, so it would be difficult for you to tell what the pictures were trying to show. So I'll show more details about the sail when I can unroll it and run it up the mast. For now, it'll stay rolled up in the spare room.